
Every year, ambitious homeowners dive headfirst into major renovation projects with high hopes and clear visions of their dream living space. They flip through design magazines, bookmark social posts, and purchase decorative finishes before the first hammer swings. Yet, without a methodical roadmap, even the most passionate project quickly turns into an expensive headache. The most common pitfall in residential construction is not a lack of vision or even a tight budget. It is simply tackling tasks out of order.
Picture this scenario: an excited owner orders pristine flooring, only to watch subcontractors drag heavy ladders and drop metal tools across the unprotected boards while patching a ceiling leak. Or consider someone who finishes painting their living room walls, only to learn that the wiring behind that drywall is fifty years old and must be replaced immediately. Tearing out fresh drywall to run copper wire hurts both the schedule and the wallet. Working with seasoned local home remodelers helps prevent these costly missteps, because veteran construction specialists understand that proper sequencing dictates long-term quality. Every board, wire, and pipe depends entirely on the step that came before it.
Phase One: Planning, Architecture, and Permitting

Long before anyone swings a sledgehammer or parks a dumpster in the driveway, the real work begins on paper. A successful whole-home overhaul requires weeks of methodical planning, accurate architectural drawings, and realistic budget allocations. Property owners must walk through every room with a critical eye, taking precise measurements while noting load-bearing walls, plumbing stacks, and electrical service panels. This is also the moment to establish a contingency fund of fifteen to twenty percent, because opening up old framing almost always reveals hidden surprises.
Securing municipal permits is another non-negotiable early milestone. Skipping the local building department might seem like a clever way to save time, but unpermitted structural, electrical, or plumbing alterations can halt construction overnight, trigger hefty fines, and complicate future property sales. Building inspectors serve as an objective set of eyes, verifying that framing changes, ventilation, and safety measures adhere strictly to regional codes. During this initial phase, owners should also finalize floor plans, select primary materials, and confirm vendor lead times so active crews never sit idle.
Phase Two: Securing the Exterior Roofline and Drainage
Construction logic dictates that builders must work from the outside in and from the top down. Before pouring capital into high-end interior finishes, property owners must ensure that the house is completely protected against exterior water intrusion. Water is the chief enemy of residential structures. It rots structural framing, breeds hazardous mold, ruins insulation, and destabilizes concrete foundations.
The first line of defense sits right along the roofline. Hiring a dedicated gutter service ensures that rainwater and melting snow flow safely away from the building rather than spilling over clogged eaves and pooling against foundation walls. Downspouts should discharge runoff several feet away from the structure. At the same time, the roof decking, flashing, and shingles must be inspected and repaired or replaced. If roof repairs are delayed until after interior ceilings are plastered, a single heavy storm can easily ruin fresh drywall, insulation, and paint within minutes.
Phase Three: Weatherproofing the Building Envelope
Once the roofline and drainage paths are secure, attention shifts to the vertical exterior surfaces. The building envelope protects interior living areas from wind, driving rain, and seasonal temperature swings. If the exterior cladding is cracked, loose, or decaying, moisture will inevitably creep into wall cavities and rot the structural sheathing.
Investing in comprehensive siding services at this juncture guarantees that exterior walls are wrapped with modern weather barriers, properly taped around window openings, and shielded against moisture. This step should also include replacing drafty windows with efficient double-pane units and installing sturdy exterior doors. Completing exterior cladding work early creates a dry, climate-controlled indoor workspace. That sheltered perimeter allows interior trades to work efficiently without worrying about sudden weather changes warping damp framing lumber or ruining sensitive building materials.
Phase Four: Demolition and Structural Reconfiguration
With a watertight exterior shell in place, the interior demolition phase can safely begin. This is often the loudest and dirtiest stage of the entire project. Demolition crews strip away outdated cabinets, damaged subflooring, and unwanted partition walls down to the bare studs. Proper dust containment strategies, including negative air scrubbers and plastic barriers over doorways, are essential to keep fine debris from migrating into clean living areas.
Once the framing is fully exposed, structural modifications can take place. Many homeowners prefer open floor plans that connect kitchen and living zones. Removing an interior wall, however, requires careful engineering calculations. If a wall is load-bearing, temporary support walls must be erected while workers install steel or laminated veneer lumber beams to carry overhead loads. Experienced local home remodelers coordinate these critical framing alterations with structural engineers to ensure that the home remains structurally sound before cosmetic work begins.
Phase Five: Roughing in Mechanical, Electrical, and Plumbing Systems
After the new structural framework is secured, the house enters the mechanical rough-in phase. This is the stage where the dwelling receives its core internal systems: plumbing supply lines, drain-waste-vent pipes, ductwork for heating and cooling, and electrical wiring. These utilities must be installed while wall studs and ceiling joists remain completely open.
Plumbers work first because gravity-fed waste lines require specific downward slopes that cannot bend around other utilities. Next, HVAC technicians install duct runs, return air chases, and exhaust vents through joist bays. Finally, a licensed local electrician runs fresh wiring, sets junction boxes, pulls dedicated circuits for heavy appliances, and updates the main electrical panel. In older houses, replacing outdated 100-amp service with a modern 200-amp panel is standard practice to support induction stoves, heat pumps, and electric vehicles. Once all utilities are run, municipal inspectors visit the site to approve each system before insulation covers the work.
Phase Six: Rebuilding the Primary Wet Rooms
Kitchens and bathrooms are the most complex and expensive rooms in any residential dwelling. Because these spaces demand close coordination between multiple specialty trades, they require an orderly, systematic workflow. Rushing this stage often results in crooked tile work, leaking fixtures, or poorly placed electrical outlets that fail modern building codes.
When tackling an ensuite or hall bathroom, high quality bath remodeling hinges on rigid substrate preparation and meticulous waterproofing. Installers must apply waterproof membranes behind shower walls, build proper pre-sloped pans, and test plumbing lines before setting a single tile. Meanwhile, in the main cooking space, a skilled kitchen remodeler focuses on precision cabinet layout and appliance placement. Cabinet boxes must be hung perfectly level and plumb, even on the uneven surfaces typical of older homes. The layout of the sink, range, and refrigerator must follow functional ergonomics to ensure smooth daily meal preparation.
Phase Seven: Below-Grade Waterproofing and Basement Expansion
Many property owners overlook the ground beneath their feet until late in the renovation process, but subterranean living spaces require specialized care. Expanding the usable footprint of a home through basement remodels provides immense living value, creating space for guest suites, home gyms, or family media rooms. However, below-grade rooms face unique moisture challenges that upper floors never encounter.
Before framing out basement perimeter walls, contractors must address soil moisture, hydrostatic pressure, and seasonal humidity. Concrete slab floors and foundation walls should be tested for moisture vapor emissions, and interior drainage channels or sump pumps must be installed if seepage is detected. Egress windows must also be cut through foundation walls to satisfy emergency escape codes for below-grade bedrooms. Only after moisture barriers and rigid foam insulation are securely fastened against masonry should framing, rough wiring, and plumbing proceed in lower levels.
Phase Eight: Insulation, Drywall, and Surface Preparation
With rough-in inspections signed off and below-grade areas properly protected, the interior begins to resemble a real home rather than an open jobsite. The next critical step is insulation. Workers pack exterior wall cavities and attic spaces with fiberglass batts, mineral wool, or spray foam to maximize thermal efficiency and dampen sound between rooms.
Immediately following insulation, drywall installation begins. Hanging gypsum board transforms framed skeletons into distinct rooms with defined boundaries. Drywall crews screw sheets to studs, tape the seams, and apply multiple thin coats of joint compound, sanding between coats until walls are flat and seamless. During this dusty phase, the local electrician often makes a brief site visit to verify that all ceiling fixture boxes, recessed housings, and low-voltage feeds remain properly aligned with drywall openings. Proper drywall finishing requires patience, as rushed taping leaves visible flaws under natural sunlight.
Phase Nine: Interior Painting and Trim Carpentry
Once drywall dust is vacuumed away and surfaces are wiped clean, the house is ready for its visual transformation. This phase brings color, character, and sharp architectural details into every living area. Interior doors, baseboards, window casings, and crown moldings are measured, cut, and fastened into place by finish carpenters.
At this point, bringing in a reliable local painting contractor delivers superior results compared to an amateur paint job. Professional painters prime fresh drywall and bare wood trim to seal porous surfaces. They caulk trim joints, fill nail holes, and apply durable, washable paint finishes to high-traffic hallways and wet rooms. Painting ceilings, walls, and intricate wood moldings before installing finished floor coverings saves hours of masking and eliminates the constant worry of paint splatters ruining brand-new floors.
Phase Ten: Hard Surfaces, Tile, and Soft Flooring Installation

Flooring represents one of the final major milestones in a whole-home renovation. Installing floors too early exposes expensive materials to heavy boot traffic, dropped tools, and abrasive construction grit that can scratch or stain delicate surfaces. Therefore, flooring installers should enter only after messy painting, sanding, and heavy mechanical tasks are finished.
Hardwood, luxury vinyl plank, or tile should be installed first in kitchens, hallways, and living spaces. In bedrooms, guest areas, and upper corridors, professional carpet installation provides warmth, underfoot comfort, and acoustic dampening that hard surfaces cannot match. Skilled installers stretch the carpet tightly over dense padding and secure it firmly to perimeter tack strips, ensuring that the finished surface remains smooth and free of ripples. Once the floors are down, carpenters return to install base shoe molding, transition strips, and hung doors trimmed to clear the new flooring height.
Phase Eleven: Connecting the Home to Exterior Grounds
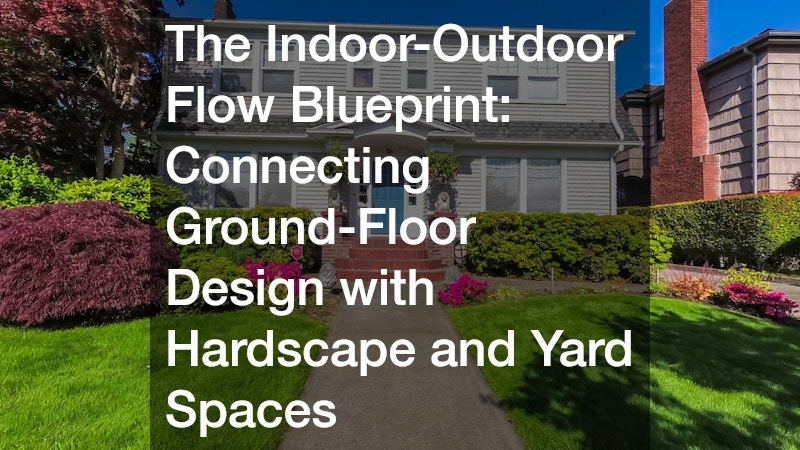
As interior work winds down, the focus shifts back to the outside of the property. Heavy construction equipment, waste dumpsters, scaffolding, and delivery trucks often leave front lawns compacted, rutted, and bare. Connecting the newly renovated house with its outdoor surroundings requires thoughtful planning and proper soil restoration.
Partnering with an experienced landscaping service restores the yard while serving practical drainage functions. Landscaping specialists regrade topsoil around the perimeter to reinforce positive slope away from foundation walls, repair damaged turf, and install stone walkways that guide visitors naturally toward the entry. Planting native shrubs, perennial flower beds, and shade trees adds vibrant color, softens architectural lines, and significantly boosts curb appeal. A well-designed outdoor environment acts as a natural extension of interior living spaces, providing functional patios for entertaining.
Phase Twelve: Fixture Trims, Punch Lists, and Final Handover
The final stretch of a master renovation sequence is all about precision and detail. With floors protected and walls painted, specialty trades return for the trim-out phase. Plumbers install sink faucets, shower trim kits, and toilets. Cabinet installers mount decorative hardware and align cabinet doors. Electricians hang pendant lights, chandeliers, and install clean switch plates.
Finally, the property owner and lead builder conduct a comprehensive walkthrough with blue tape in hand. They inspect every room, checking that doors swing freely, windows latch securely, and water runs hot at every tap. A local painting contractor performs quick brush touch-ups on minor scuffs created during fixture installations. Once the punch list items are resolved and professional cleaners remove the last traces of construction dust, the transformation is complete. Following a methodical, phase-by-phase renovation sequence turns what could have been a chaotic ordeal into a stunning, durable home built to stand the test of time.